Ford Ranger
Bumper Bashing and Reverse Camera
Bumper bashing
In 2016, I bumped into a garage door at Zeke's place. It cost me quite a bit of money to cover the excess of the complex's insurance. What was strange about the whole incident was that there was absolutely no damage to the bakkie, but the garage door had to be replaced.
This year, I bumped into a tree at Tom's. It felt like less of a bump than the one at Zeke's place, but this time I caught it on the bumper. The plastic on the bumper was cracked, the steel in the bumper was bent and the bodywork was a dinged.
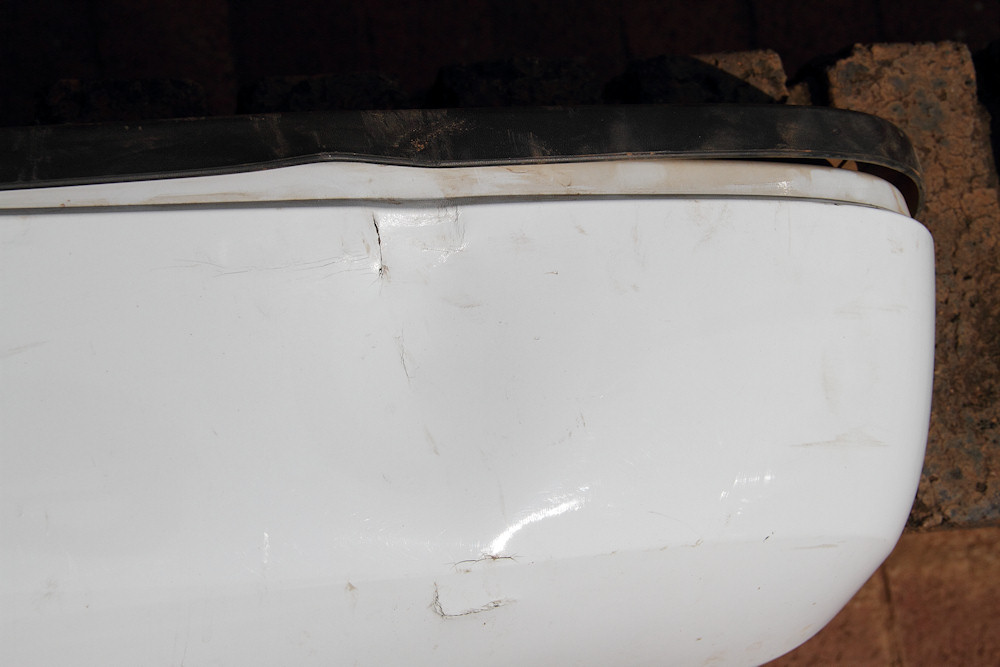
The crack in the bumper and the rubber step bent away from the bumper
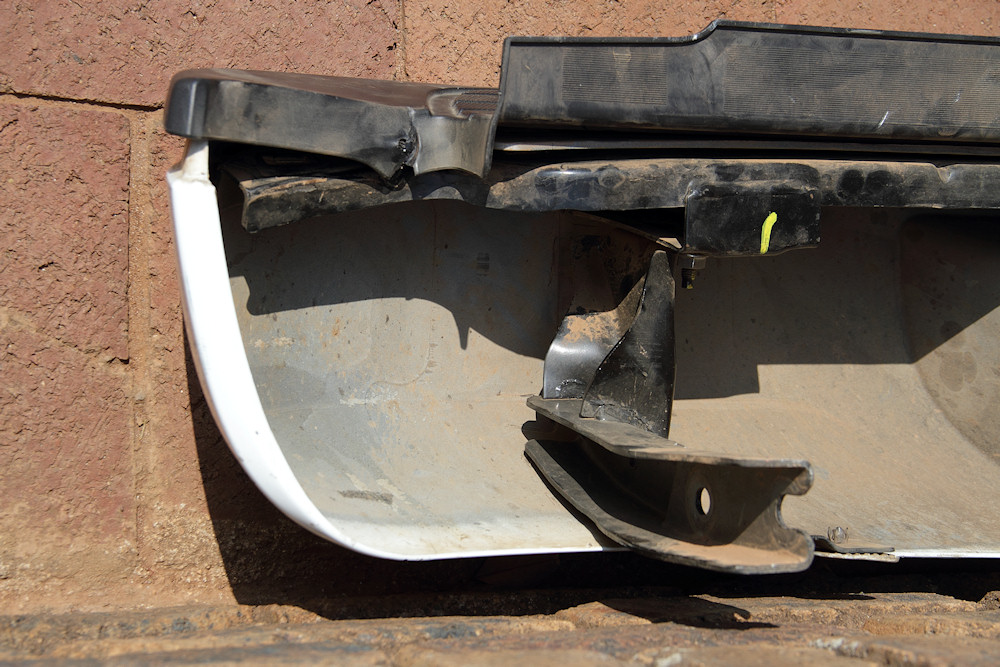
The bent steel in the bumper
It looked as though it could be fixed, but most of the clips holding the rubber step in place had broken off. I decided to replace the bumper as it was pressing against the bodywork, and any flexing of the chassis would result in more damage to the bodywork.
I went to the dealer, and got a price of R8500 (excluding VAT) on a new bumper and was told that the bumper would probably be black and I would have to have it colour coded to the body work myself, if I wanted.
Someone on the SA 4x4 Community suggested that I look around for a second hand one, as often people replace the factory fitted plastic bumper with a more macho looking steel one. It didn't take me too much effort to find one, at a place called Springbok Used Motor Parts in Springs. I was quoted R2500 (including VAT) by the contact person. He also emailed pictures of the bumper (which was black), and from the pictures it looked to be in pretty good condition, so I decided to drive down to Springs to purchase it.
I was more than happy when I got there that the salesman said I could have it for R2000 (including VAT) so, even with the diesel use on a 130km round trip, I made an appreciable saving.
The bumper is fastened onto the towbar by four bolts. (I also had to buy an 18mm socket, as my socket set did not have one!) There is also an electrical connector for the wiring to the number plate lights which has to be unclipped. The only irritating thing in this exercise was the number plate which was rivetted into the holder. The number plate has to be removed before the holder can be removed as the screws are behind the holder. Removing the rivets without damaging the plastic on the number plate was trickier than I expected.
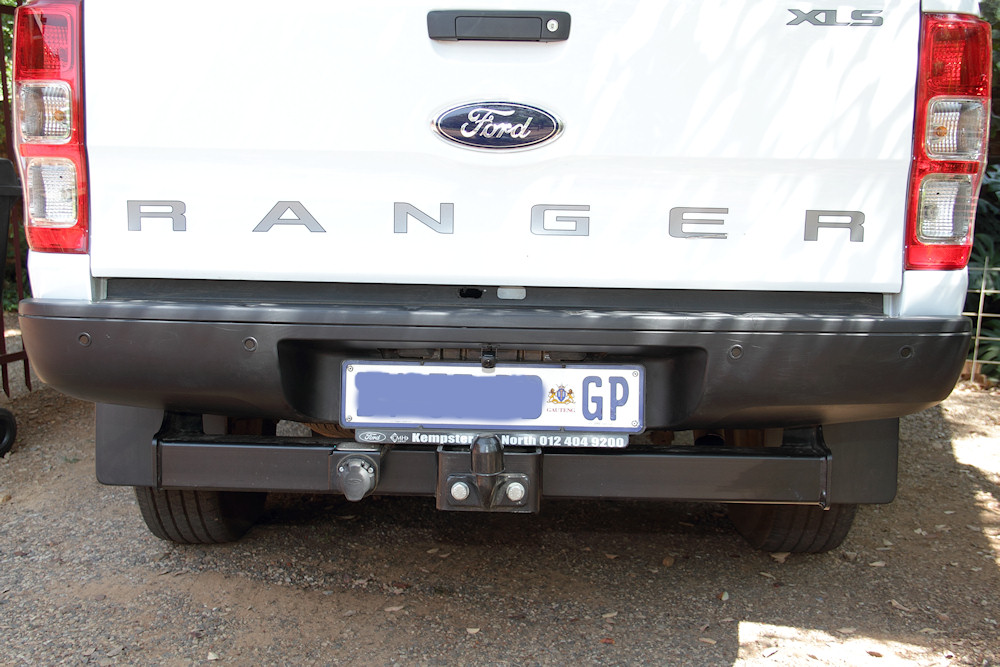
The bumper fitted.
Another problem I did have was that the slot on the bumper for lowering the spare wheel was not aligned with the slot in the body work (below the N and the G in RANGER). In the above picture, you can see the new slot I made, with the original slot showing the bodywork through the slot.
I polished the bumper with some Wynn's Black Back and from the picture above, you can see I got a pretty decent finish. The black also does not look too out of place. If one didn't know that the XLS came out with a colour coded bumper, one would be none the wiser.
Reverse Camera and Reverse Proximity Sensors
After the first bash, I thought that I may need a reverse camera as there was a blind spot from the mirrors as a result of the height of the load box as well as the canopy. After the second bump (on the same side as the first), I was convinced that the reverse camera was a necessity.
Marcel Pel, the guy who sold me the bakkie, recommended two installers of the reverse camera. I chose Hatfield Sound and Security as they were fairly conveniently situated (they unfortunately don't have a website, but the contact details are here). They recommended that I also have reverse proximity sensors installed as the camera on its own can give misleading information as the wide angle lens on the camera can severely distort the image shown. The setup would also entail fitting a new rear view mirror which contains the display from the camera, when reverse gear is engaged.
In the previous picture, one can see the reverse camera (vertically above the tow hitch) and the four proximity sensors in the bumper. In the picture below, you have a closer view of the camera and one of the proximity sensors.
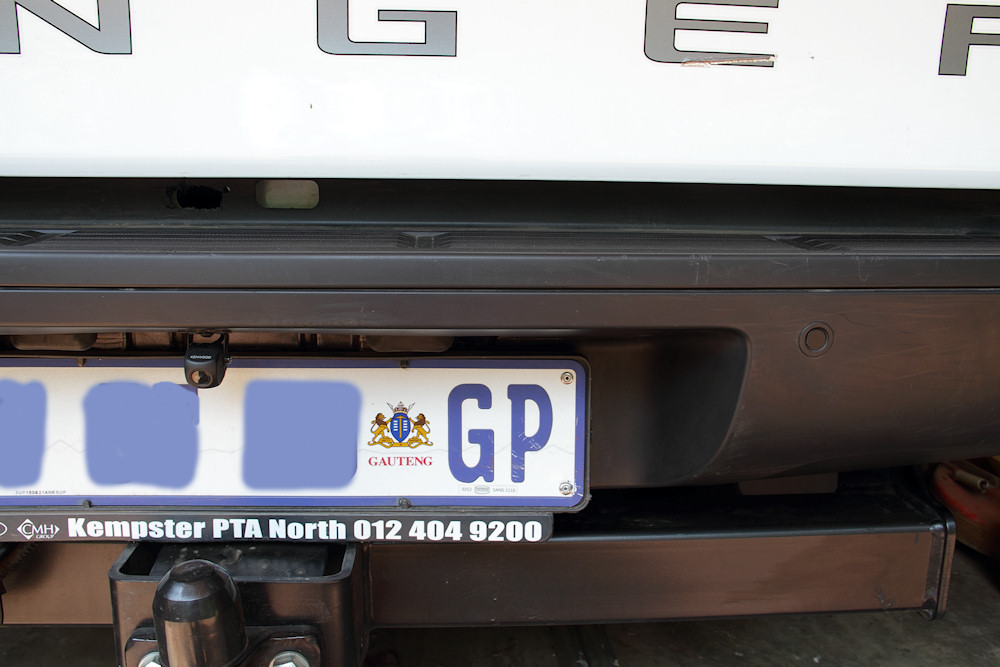
A close-up of the reverse camera and one of the proximity sensors
In the picture below, one can see the display from the reverse camera in the rear view mirror. Note the green, yellow and red guidelines as well as the tow hitch in the image. Above the mirror, you can see the small conduit carrying the wiring to the mirror.
To have some indication of distance, I reversed up to the gate and measured the distance between the bumper and the gate:
- Start of the green lines: 1.2m
- Start of the yellow lines: 0.8m
- Start of the red lines: 0.35m

The reverse camera display in the rear view mirror
The proximity sensor control unit beeps once when the reverse gear is engaged, then beeps at roughly one second intervals in the green zone of the reverse camera image above; at half second intervals in the zone of the first two yellow bars; and continuously closer than that.
Total cost for reverse camera and reverse proximity sensors, including fitment, was R9500 (28 September 2017). I was very happy with the job.
Back to the bakkie's story.
